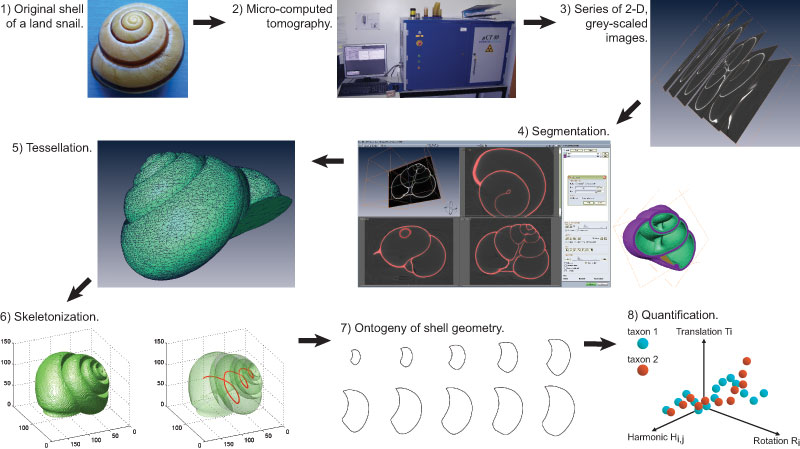
FIGURE 3
. Flow diagram of the major steps of the method. See text for explanations.