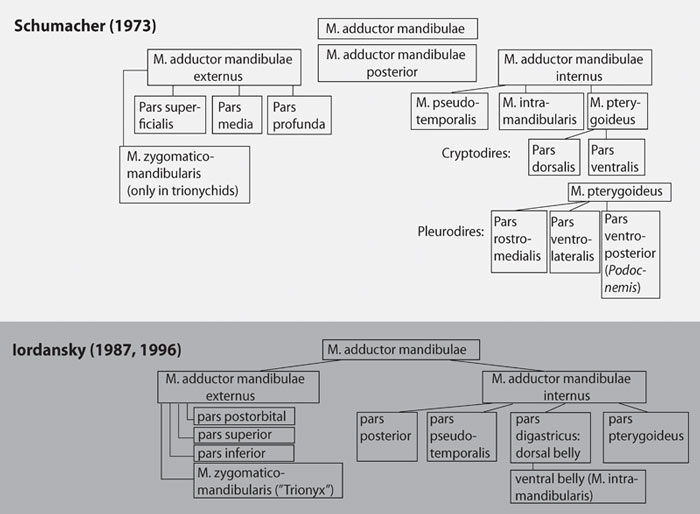
FIGURE 4
. Continuation of
Figure 2
and
Figure 3.